
Hey everyone!
I think this has been covered, but I couldnt find it. Hopefully others find this useful...
I know most of the time trouble code P0442 is most likely a leaky gas cap, but in my case, I've been through 4 diff gas caps, and finally found my real problem.
I inspected all the lines, and the cars pretty clean. I like to think I take care of my baby.. but as you can see....
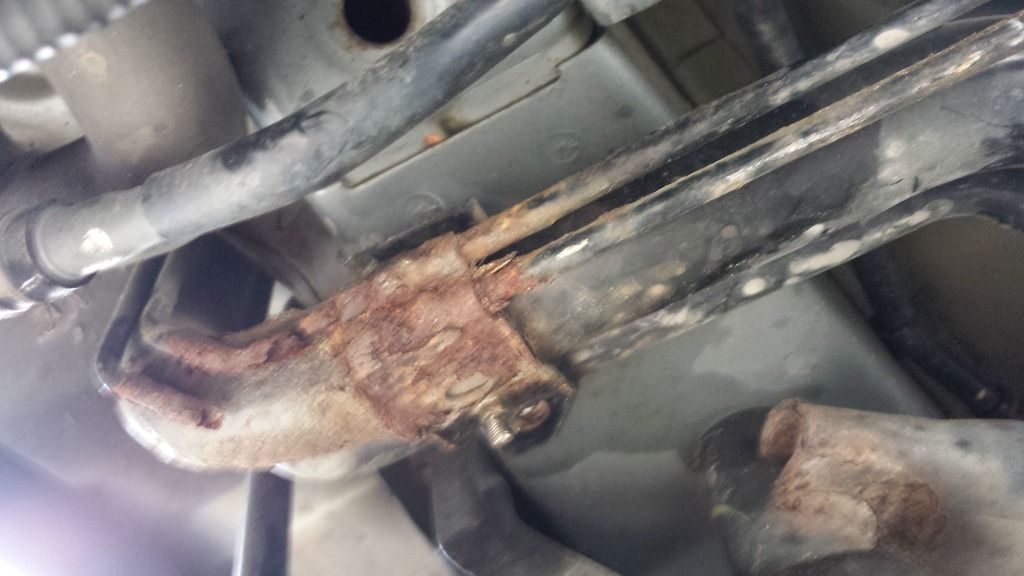
I filled up on gas one day and noticed at my rear wheel a small drip of gas at my next stop, then inspected the car again and noticed this...
a leak from the fuel line bracket.
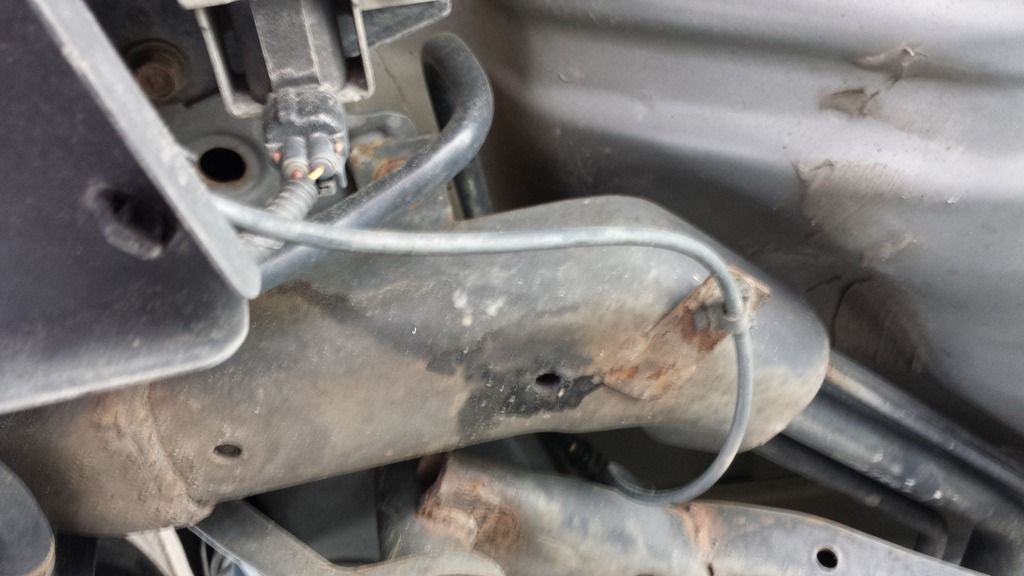
as you can see, the fuel lines look fine at first glance, but after crawling under there, I see the likely culprit...a rusty line...
now I want to get the bracket off to fully inspect the lines...
sprayed all bolts with wd-40, waited...... broke all but 2 bolts. they were really rusted...
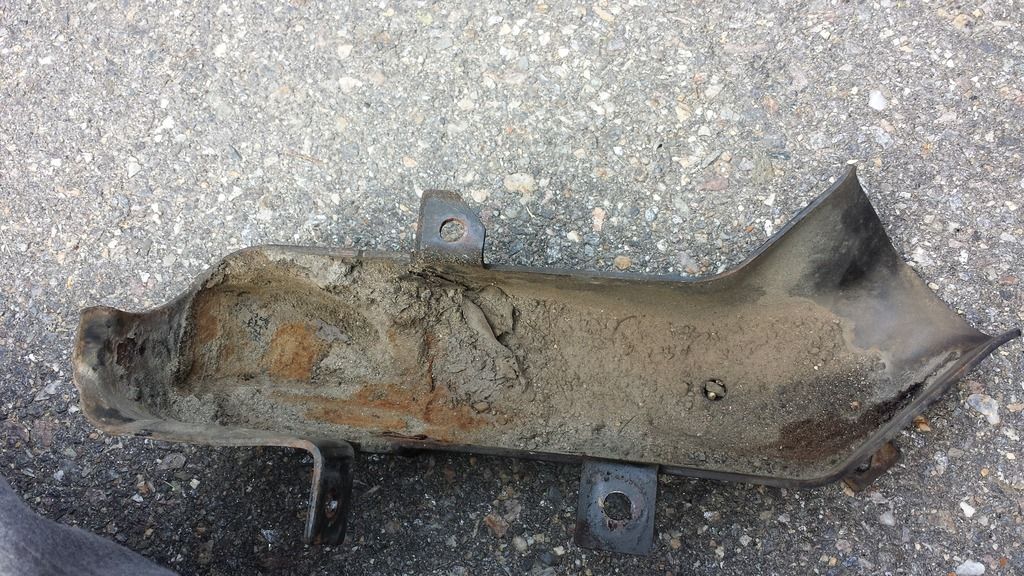
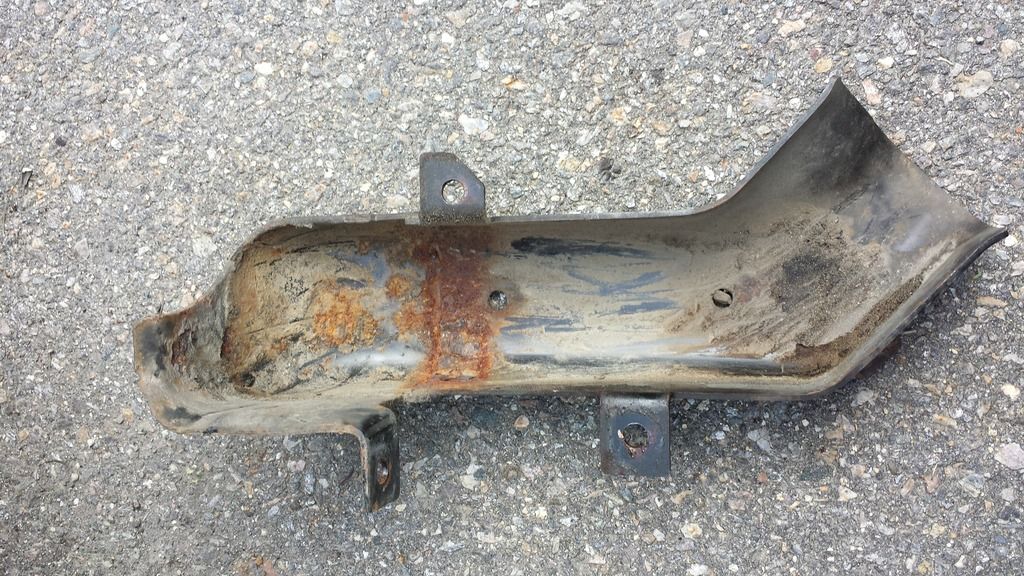
as I'm trying to get the bracket off, I notice its full of dirt and rocks and dosent want to come off...
I finally get it off and its full of dirt/muds/rocks/rust/etc...

Notice my drain holes are clogged and the rust lines in the mud from the rusty lines...
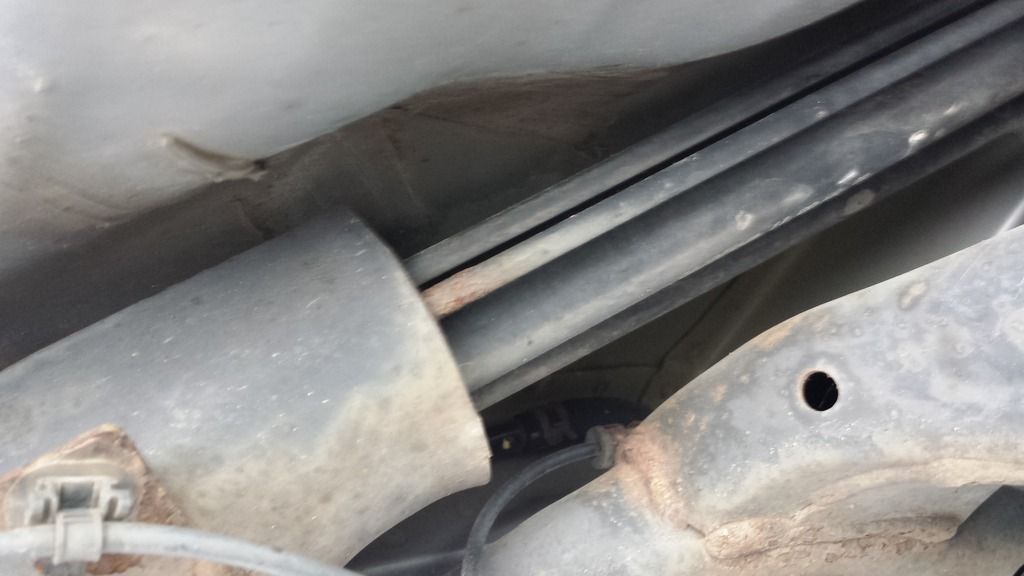
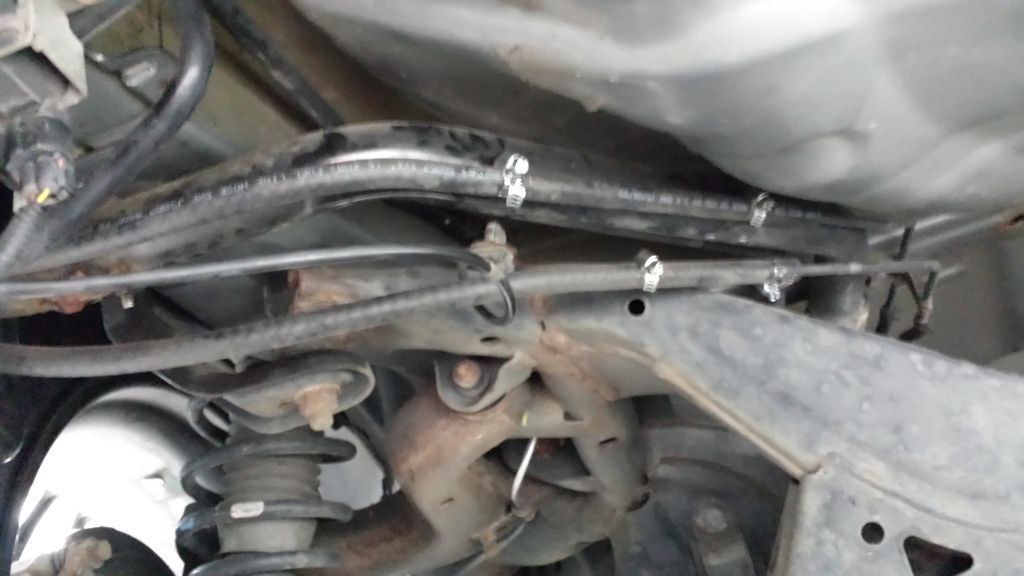
look back up at my lines and found the problem....
2 broken/missing lines....

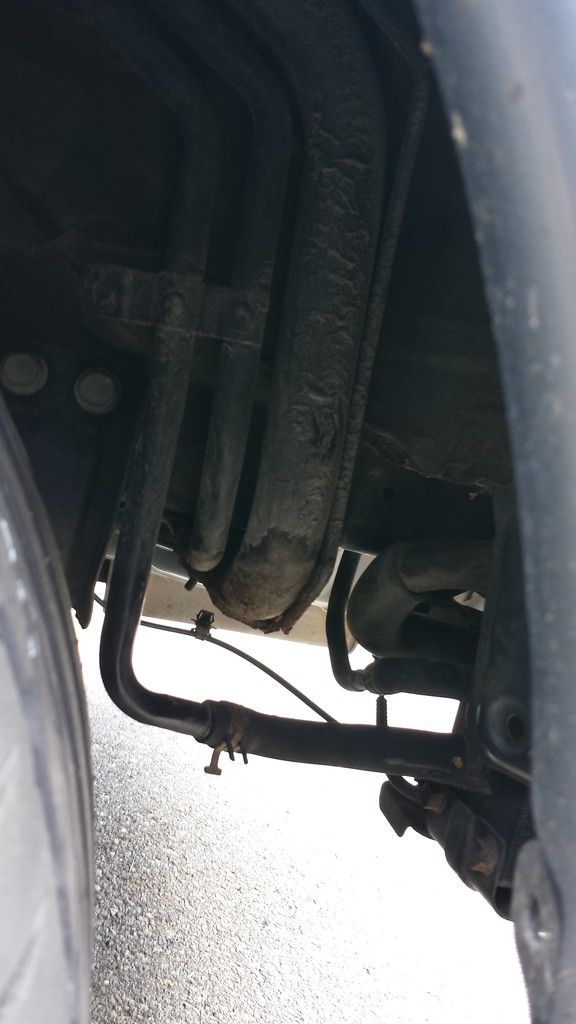
took the rear wheel splash guard off to get a side view...
(notice all the mud on the fuel lines, its gotten past the splash guard and just seeps down the lines.)
It was either wait and order oem part for like $280.00 or fix now....
Heres what I did, it cost me about $9.00 with 6.4mm fuel line from auto parts store and 4 small hose clamps...
cut all the rusted sections out... DONT MIX UP THE LINES. maybe do 1 line at a time...
PLEASE NOTE= In my case, my FILLER line is not broken, but it is rusty, I'll need to repair it soon. I'm just repairing the 2 small fuel lines for now...I think there return lines, or fuel vapor lines..not sure...)
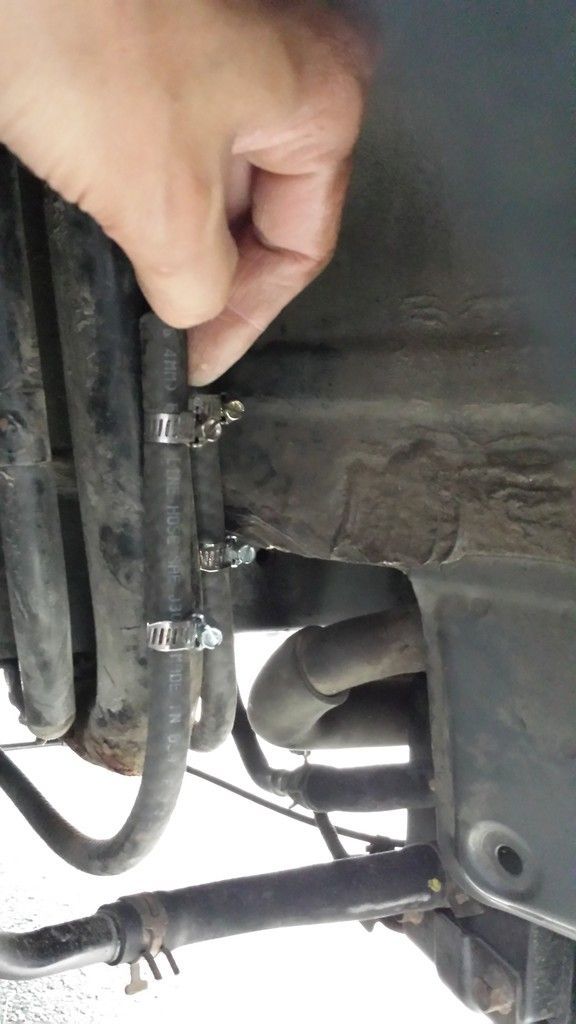
then add the 6.4mm ID fuel line over one end, leaving enough slack to get the hose clamp on....then over the other end...dont forget the other hose clamp....
(I got 2, 2 feet pieces of line, and figured I'd cut the extra, but ended up useing it all. figuered the more the better and the more clamps I could put on.)
side shot (notice 6.4mm just past my thumb)
heres the bracket after I cleaned most of the dirt and mud out...
That rock in the hole fell out after the pic....
I havent put the bracket back on yet, but will soon. Was waiting to see it it fixed the problem... 2 weeks so far, NO more check engine light! = D
( I might make my drain holes a little bigger before putting it back on the car.)
Id say its a good idea to keep an eye on those 2 drain holes...
looks like everything from your real wheel finds its way into that bracket...even past your rear wheel spalsh guard...
EVERYONE GO CHECK YOUR DRAIN HOLES! : )
I think this has been covered, but I couldnt find it. Hopefully others find this useful...
I know most of the time trouble code P0442 is most likely a leaky gas cap, but in my case, I've been through 4 diff gas caps, and finally found my real problem.
I inspected all the lines, and the cars pretty clean. I like to think I take care of my baby.. but as you can see....
I filled up on gas one day and noticed at my rear wheel a small drip of gas at my next stop, then inspected the car again and noticed this...
a leak from the fuel line bracket.

as you can see, the fuel lines look fine at first glance, but after crawling under there, I see the likely culprit...a rusty line...

now I want to get the bracket off to fully inspect the lines...
sprayed all bolts with wd-40, waited...... broke all but 2 bolts. they were really rusted...
as I'm trying to get the bracket off, I notice its full of dirt and rocks and dosent want to come off...
I finally get it off and its full of dirt/muds/rocks/rust/etc...

Notice my drain holes are clogged and the rust lines in the mud from the rusty lines...

look back up at my lines and found the problem....
2 broken/missing lines....


took the rear wheel splash guard off to get a side view...
(notice all the mud on the fuel lines, its gotten past the splash guard and just seeps down the lines.)

It was either wait and order oem part for like $280.00 or fix now....
Heres what I did, it cost me about $9.00 with 6.4mm fuel line from auto parts store and 4 small hose clamps...
cut all the rusted sections out... DONT MIX UP THE LINES. maybe do 1 line at a time...
PLEASE NOTE= In my case, my FILLER line is not broken, but it is rusty, I'll need to repair it soon. I'm just repairing the 2 small fuel lines for now...I think there return lines, or fuel vapor lines..not sure...)
then add the 6.4mm ID fuel line over one end, leaving enough slack to get the hose clamp on....then over the other end...dont forget the other hose clamp....
(I got 2, 2 feet pieces of line, and figured I'd cut the extra, but ended up useing it all. figuered the more the better and the more clamps I could put on.)

side shot (notice 6.4mm just past my thumb)

heres the bracket after I cleaned most of the dirt and mud out...
That rock in the hole fell out after the pic....

I havent put the bracket back on yet, but will soon. Was waiting to see it it fixed the problem... 2 weeks so far, NO more check engine light! = D
( I might make my drain holes a little bigger before putting it back on the car.)
Id say its a good idea to keep an eye on those 2 drain holes...
looks like everything from your real wheel finds its way into that bracket...even past your rear wheel spalsh guard...
EVERYONE GO CHECK YOUR DRAIN HOLES! : )
")


